
Faster alignment
QIDALASER Beam Alignment Kit
A clear target puck on an aluminium base that centres the beam at each mirror
- Supplies & tools
- Fits K40-size CO2 lasers
Most K40s that stop cutting have a beam problem, not a dead tube. Walk the beam through three mirrors, set the lens right, and full power usually comes back.
Current as of September 2026Align mirror 1 to the tube, then hit mirror 2 at the near and far gantry positions, then mirror 3 at all four corners, using tape targets and short low-power pulses. Set focus to the lens's focal length, 50.8mm on the stock lens, with the curved side of the lens facing up.


Every pulse travels a fixed path before it touches your work. It leaves the tube, bounces off mirror 1 in the back corner, runs to mirror 2 on the moving gantry, then to mirror 3 on the head, and drops through the lens.
Any angle error grows with distance. A beam a fraction of a degree off at mirror 1 lands millimetres off at the far corner of the bed, and part of it clips a mount instead of reaching the lens.
The K40 laser mirrors drift for ordinary reasons:
Align on arrival, after any optic or tube swap, and whenever cut depth varies across the bed. Checking takes ten minutes once you know the routine.
Before touching any screw, clean all three mirrors and the lens with lens tissue and isopropyl alcohol. A smoky optic mimics bad alignment, and chasing it with the screws only makes things worse.
| Symptom | Likely cause | Check first |
|---|---|---|
| Cuts through at one side of the bed, not the other | Mirror 2 or 3 out of line | Tape test at all four corners |
| Weak everywhere, used to cut fine | Dirty or pitted lens or mirrors | Clean, then inspect under a light |
| Wide, fuzzy line | Focus off, or lens upside down | Ramp test; curved side of the lens up |
| Scorch marks on the nozzle, not the work | Beam clipping the head | Mirror 3 entry and exit points |
| Power fades during long jobs | Coolant too warm | Water temperature and flow |
| No fire at all | Laser switch off, water interlock, supply fault | Laser enable, test button, supply LED |
| Normal mA but a weak cut | Tube near the end of its life | Discharge colour and running hours |
Work from the top row down. The first four rows cost nothing but time; only the last row needs a new part.
The golden rule of K40 laser alignment: to move the spot on a target, adjust the mirror before it. Work strictly in order, because every change upstream moves everything downstream.
Use a fresh piece of tape for every pulse, or you will read an old mark. Keep the pulses at the lowest current that still marks the tape.
Most mirror mounts have three adjusting screws. Learn which one moves the spot mostly up-down and which mostly left-right, then turn in quarter turns and pulse after each.
|
QIDALASER Beam Alignment Kit |
XUNKUANER ZnSe Focus Lens |
MCWlaser CO2 Laser Mirrors |
 FONLAND Lens Nut Removal Tool
 |
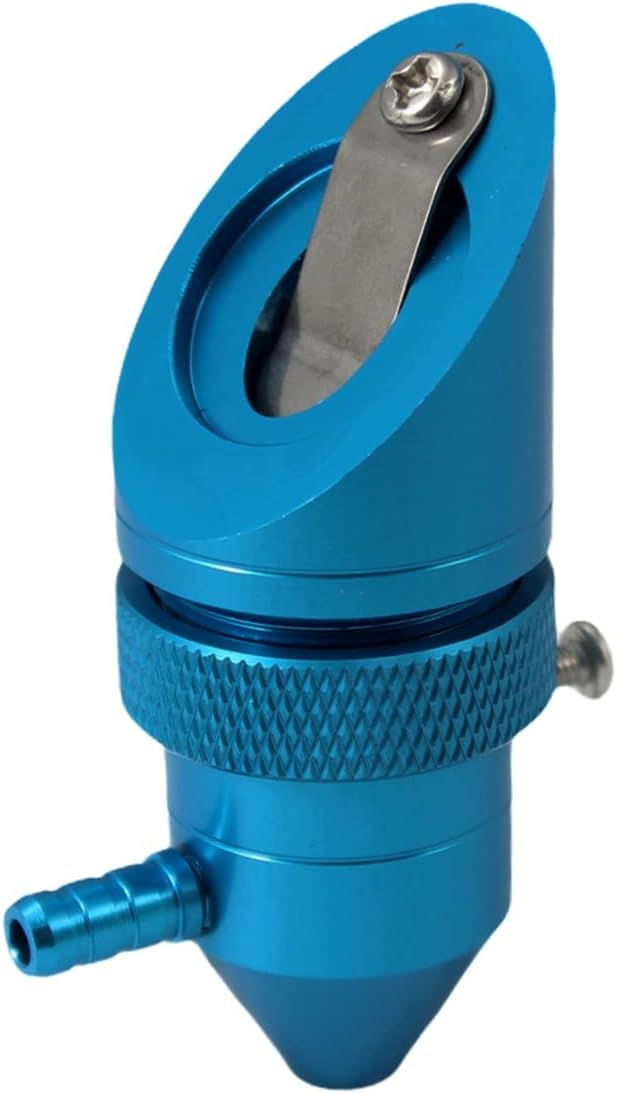 Lightobject K40 Air-Assist Head
 | |
| Type | Supplies & tools | Lens & mirrors | Lens & mirrors | Supplies & tools | Laser head |
| Power | — | 30W | — | — | — |
| Size | — | 18mm | 20mm | — | 12mm |
| Air assist | — | — | — | — | Yes |
| Fits K40 | Check size | Check size | Check size | Yes | Yes |
| View offer | View offer | View offer | View offer | View offer |
Masking tape and patience align a K40 fine. The right few tools make the job faster and keep your fingers off the optics.
What belongs in the drawer next to the machine:
Upgraded optics make the next alignment easier too. They also hold their coating through repeated cleaning, so a routine wipe no longer costs power. Stock K40 mirrors are often K9 glass with a thin gold coat, which fades and cracks. Gold-plated silicon or molybdenum mirrors reflect more of the beam and survive cleaning.
An air-assist head such as the Lightobject K40 head adds one more benefit. Air across the lens keeps smoke off it, so the optics stay clean between alignments.
This tool removes and refits the lens locking ring and the retaining rings on all three mirror mounts of aftermarket K40 heads and mirror sets. The ribbed handle gives grip without fingers touching the optic.
View offerPerfect mirrors mean nothing if the beam is out of focus at the work. The lens concentrates the beam into a tiny spot at one distance only, and the K40 standard is a 50.8mm (2 in) focal length.
The K40 laser focus distance is measured from the lens, not the nozzle tip. Since heads differ, find the true point with a ramp test:
For engraving, focus on the surface. For cutting thicker stock, many owners set focus slightly into the material, and a test cut tells you what works for yours.
Lens orientation matters just as much. A plano-convex lens goes curved side up, towards mirror 3, and flat side down. A meniscus lens also goes convex side up. Upside down, the spot grows and the cut weakens.
K40 laser lens sizes vary by head:
Measure your old lens before ordering. Diameter and focal length both have to match the head.
A K40 laser not cutting is rarely a dead tube. Work through the cheap checks first, in this order, and stop as soon as the cut comes back.
If the tube fires but the ammeter barely moves, suspect the power supply. If there is no fire at all and the supply shows no activity, it is the first place to look.
Tubes wear out with hours and heat. Keep current modest, keep the water cool, and a tube lasts far longer. When yours is spent, match the K40 tube and power supply by length and safe mA.
Owners of a stock machine who keep chasing alignment often end up upgrading the head and mirror mounts. The K40 upgrade order puts those parts in sequence.
The stock lens has a 50.8mm (2 in) focal length, measured from the lens. Confirm the real point on your head with a ramp test.
Curved side up, towards mirror 3, flat side down. A meniscus lens also goes convex side up.
Most stock heads take a 12mm lens and 20mm mirrors. Upgraded heads take 18mm or 20mm lenses, so measure before ordering.
On arrival, after changing a tube or any optic, and whenever cut depth varies across the bed. Otherwise a quick four-corner check every few months.
Usually dirty optics, a knocked-off laser switch, warm water or drifted alignment. Check those before suspecting the tube or power supply.


